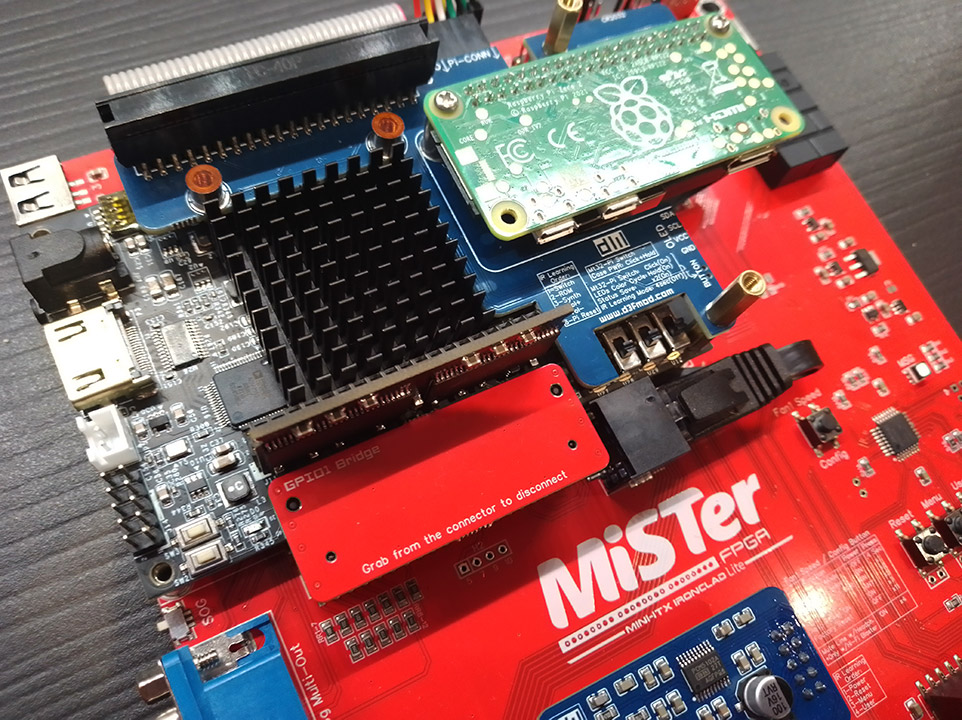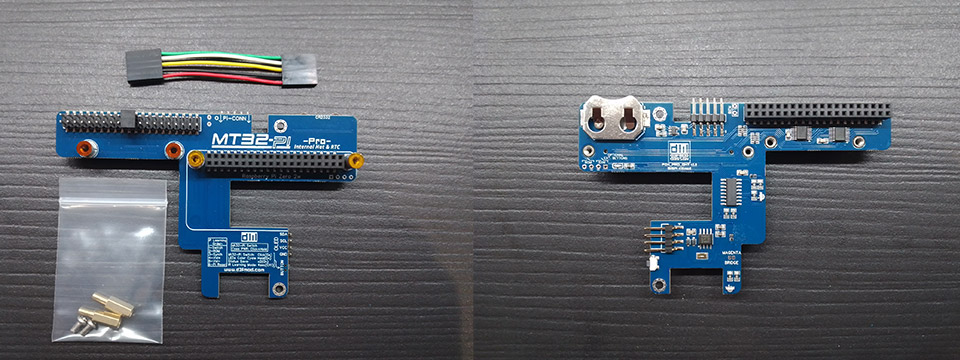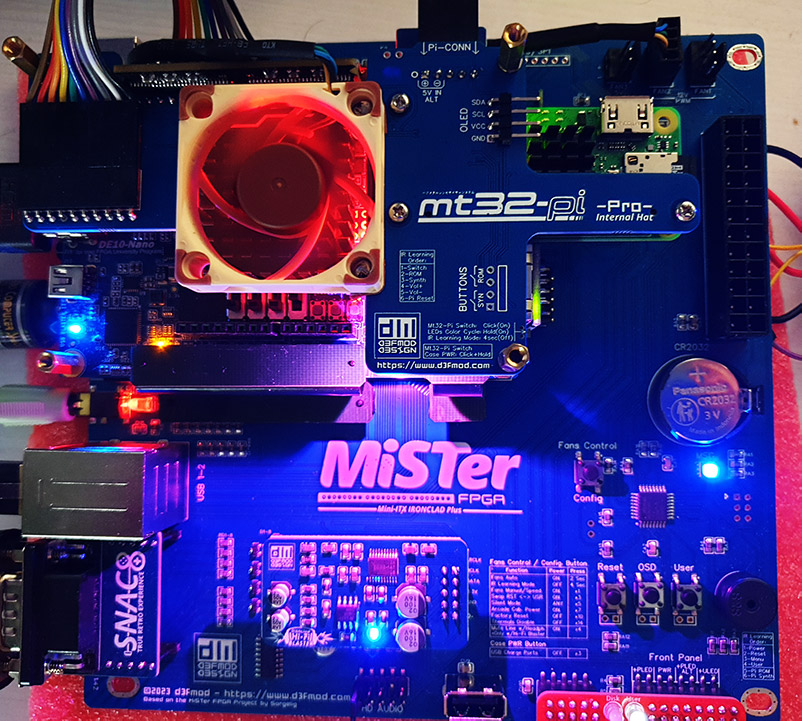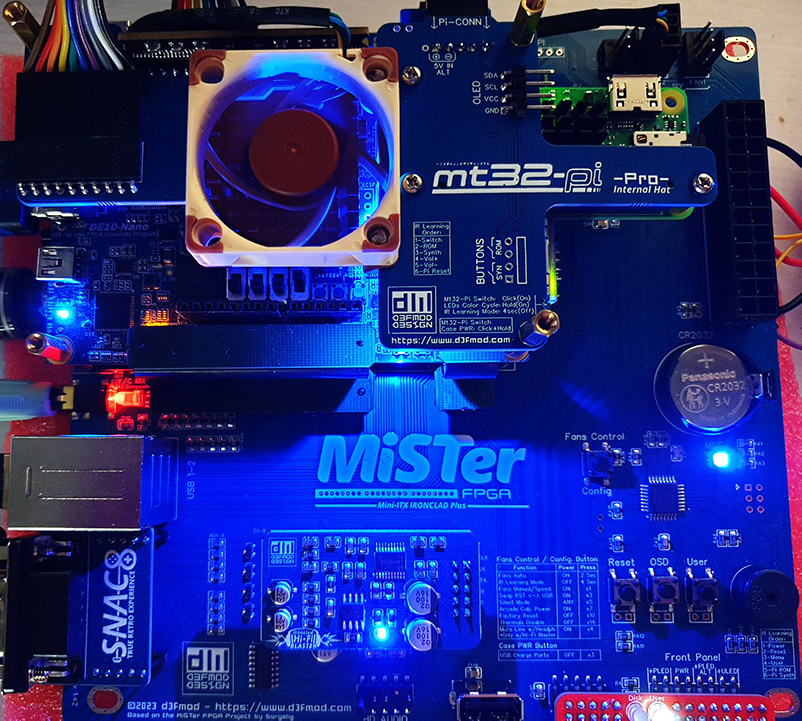
The Mt32-Pi PRO Internal Hat for QMTECH Cyclone V allows to internally install a Raspberry-Pi Zero 2w to work as an mt32-Pi. It connects on top of your QMTECH board and is able to switch the main UserIO port between the Mt32-pi and whatever device you have connected externally, this is a huge step forward as this brings the full integration of all devices while still being compatible with the main MiSTer official cores. Everything remains internal and nice, no more connecting and disconnecting stuff to switch between SNAC controllers, guns, etc, and the mt32-pi. The definitive solution to have everything ready to use at any moment!. It also serves as RTC (Real Time Clock) module for MiSTer, which allows to keep time and date even when the system is off, which is a very handy feature for many computer cores.

Main Features:
- Switches between the Internal Mt32-Pi and external UserIO devices
- Compatible with official main MiSTer cores
- The switching can be done using the remote control and/or the case power button
- Allows full mt32-pi remote control; switching mt32-pi <> UserIO, roms, synths, volume, and pi reset
- Remote control commands can be learned so you can use your own remote
- Has two leds to illuminate the internals of your Ironclad Lite setup with 5 different user selectable color combinations
- Turns off your Raspberry-Pi when it is disabled (external ports enabled) for more than 60 seconds to save power and reduce internal heat. A green led indicates the status of the Respberry-Pi
- It has a header to connect your mt32-pi compatible OLED display
- External rom and synth buttons can also be wired
- It has two holes to screw a 40x40mm fan on top of the FPGA chip to keep it cooler, optional, read below.
Beware, the Mt32-Pi PRO Internal Hat is compatible only with the Ironclad Lite v1.10 and newer, and requires the QMTECH/Mister Pi compatibility kit!.
The hat has two standoffs to mount a 40mm fan on top of the FPGA, you will need two M3 screws with a lenght according to the thickness of your fan, usually 15mm long should fit well, fitting a fan is usually not necessary, specially if you bought the “Massive Heatsink” along with your Ironclad, as a single fan extracting hot air from the case is enough, or even passive operation is possible, but there are some Mini-ITX cases that don’t have a single place to properly mount a FAN, and in that situation this addition becomes really handy. Suggested fan model for this purpose might be the Noctua NF-A4x10 5V PWM (5v) for the Ironclad Lite, but any 40mm fan will fit and work, be it PWM or not, as usual. Note that only PWM fans (4-pins) benefit from the fan control or adjustable speed from the Ironclad boards.
The kit includes:
- The mt32-Pi PRO Internal hat.
- All screws and Stand-offs needed for installation.
- 5-pins female to female ribbon cable.
This Hat is only intended for the Raspberry-Pi Zero 2w and, maybe, future “Zero” models the Mt32-Pi project will support. A standard sized Raspberry-Pi will not fit. A ribbon IDC extension cable might help with that, also power consumption would be much higher in the big Raspberry-pi models. You are on your own in that adventure.
Instructions:
This installation instructions assume you already have a working Raspberry-Pi Zero 2w with the GPIO header already soldered (In some sites they sell this as “headered”). Also, installing and configuring the MT32-pi software to work in your Pi is out of the scope of this instructions, you can follow THIS easy guide from the mt32-pi official wiki.
- Remove the factory protection stickers over the metal standoffs of the Hat and any plastic protector over the pinheaders if there is any
- Replace the two right screws from your QMTECH Cyclone V with the supplied 10mm male-female standoffs
- Connect the hat over your Qmtech Cyclone V in place of the upper 40 pins ribbon cable, simply disconnect the ribbon cable from the QMTECH, making sure the holes of the hat align with the standoffs you placed before.
- Screw the hat in place using the two screws you removed in step 2
- Connect the ribbon cable to the hat (the ribbon cable then interconnects the Hat with the Ironclad)
- If you are attaching a fan to the Hat, now is the time to do it, there are two standoffs for M3 screws, you will need them to be longer than the thickness of your fan, the recommended Noctua fan is 10mm thick, so 15mm M3 screws will work fine.
- Connect your Raspberry-Pi Zero 2W upside down to the female connector on the Hat, and use the two supplied screws to secure it in place.
- With the supplied 5 pins ribbon cable interconnect the Hat to the Ironclad using the Pi-CONN connectors keeping the cable orientation straight.
Real Time Clock (RTC) Feature:
This feature is integrated in the device and needs no additional operation or installation, simply place a CR2032 battery in the metal holder (positive pole faces down to the Ironclad PCB), synchronise your MiSTer RTC while you are on-line using the RTC script and you are ready to go, date and time will be kept.
Switching using the CASE POWER BUTTON:
You can switch between the Internal MT32-Pi and the external UserIO ports using your case’s power button. To do that, when the system is ON, you have to press the power button and then quickly press it a second time but keeping the key pressed till you hear a beep (the beep is different if you are enabling or disabling the mt32-pi). Another way of explaining it would be; do a double click on the power button as if it were your computer’s mouse, but on the second click do not release the button and keep it pressed till you hear the beep. It is easier doing it than explaining it, trust me.
Default remote control keys:
- PLAY key: Switches between Internal MT32-Pi and external UserIO
- 0 key: Changes mt32-pi loaded rom
- C Key: Changes mt32-pi synthesizer
- +/- Keys: Mt32-Pi midi volume increase/decrease
- 8 Key: Resets the Raspberry-Pi
All this commands can be re-assigned to another remote control using the remote learning feature, this feature works as in the Ironclad board, but using the button on the Mt32-Pi PRO Hat instead to trigger it. To enter this mode, while the system is off, press the MT32-Pi PRO single button for 4 seconds and the led will start to blink while the Ironclad is waiting for the new remote key presses to learn, the order of the commands to introduce is written on the Mt32-Pi PRO Hat for your future reference, which is:
- Switch
- Rom
- Synth
- Vol+
- Vol-
- Pi Reset
Remote learning can be cancelled at any time pressing the Ironclad’s case power button, it is also cancelled automatically if no new command to learn is introduced within 30 seconds. To save the new commands the learning process must be fully completed, if the process is cancelled the previous values are restored for all buttons.
Color led modes:
Using the MT32-Pi PRO Hat button you can also choose between the 5 predefined leds color combinations, to do that, with the system ON, press the button and keep it pressed, it will start to cicle through all the color modes for as long as you keep the button pressed. When you have the color scheme you like the most release the button and the setting will be saved automatically.

